Description
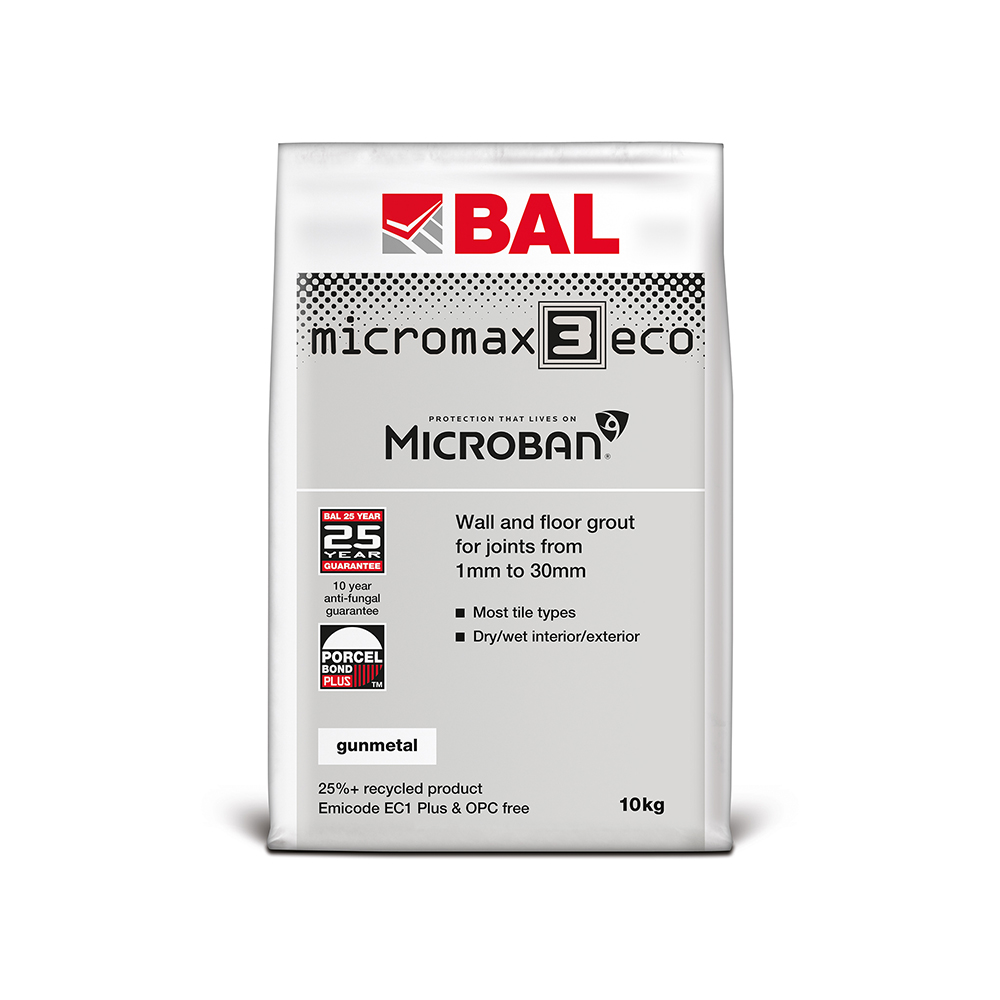
BAL Micromax 3 ECO Tile Grout is a rapid-setting, rapid-hardening, highly flexible, water/frost-resistant cementitious tile grout with built-in Microban antimicrobial protection for use on walls and floors.
BAL Micromax 3 ECO Tile Grout can be used on grout joint widths from 1mm to 30mm. It is suitable for use with porcelain, glazed and fully vitrified, glass and ceramic mosaics, marble and natural stone tiles in dry and wet interior and exterior environments. Recommended for power showers, wet rooms, heated floors and timber floors.
BAL Micromax 3 ECO Tile Grout is NOT suitable for use in food preparation/storage areas, Spas, Jacuzzis, Chemical Plants, Power Showers with body jets and areas requiring waterproof grouting. For these areas we recommend using BAL Absolute Grout, an epoxy resin tile grout.
BAL Micromax 3 ECO Tile Grout sets in 2-3 hours, which enables faster completion of the tiling application. The efflorescence-free formulation minimises risk of patchy discolouration. This grout is also water/frost-resistant and features a built-in admixture for increased flexibility and enhanced durability which ensures a clean, even finish for grout joints.
The Microban antimicrobial protection built in to BAL Micromax 3 ECO Tile Grout inhibits growth of bacteria (e.g. Listeria, Salmonella, E-Coli) and black mould on the finished grout joints and provides added hygiene protection for bathrooms, showers and food consumption areas.
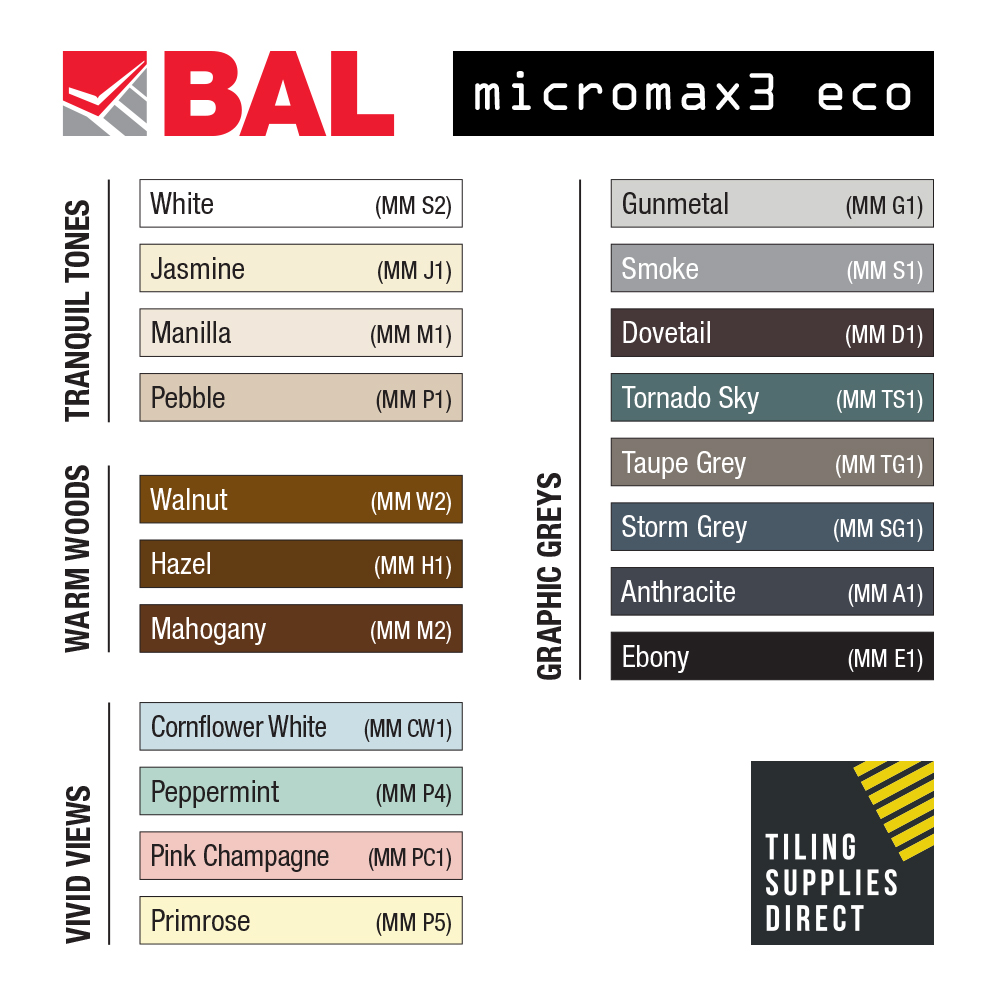
BAL Micromax 3 ECO Tile Grout is available in 2.5kg, 5kg and 10kg bags, in the following colours: White, Jasmine, Pebble, Walnut, Hazel, Mahogany, Gunmetal, Smoke, Dovetail, Tornado Sky, Taupe Grey, Storm Grey, Anthracite, Ebony, Cornflower White, Peppermint, Pink Champagne, and Primrose. (Note: certain sizes may not be available for all colours) You can view the colour chart on the gallery above or via the link at the bottom of this page.
BAL Micromax Silicone Sealant is also available to match in 16 of the most popular colours.
IMPORTANT NOTE: Do NOT use BAL Micromax 3 ECO Tile Grout in temperatures below 5°C or in damp conditions. If grouting porous tiles in temperatures above 25°C, dampen joints with clean water prior to grouting. If grouting externally, provide protection against inclement weather during grouting and for as long as possible afterwards. It is recommended that all external tiling applications include a DPM or a surface DPM can be applied prior to tiling (e.g. BAL DPM).
If grouting shower installation, BAL Micromax 3 ECO Tile Grout is water-resistant but NOT impervious to water and not a substitute for a waterproof tanking system.
Recommendations:
– Provide waterproof tanking protection for tiling background substrates, particularly plaster or plasterboard (e.g. by using the BAL Tank-It System or BAL Waterproof 1C Tanking Membrane).
– Ensure tiles are fixed with a solid bed with a water-resistant adhesive.
Mixing:
1. Use an appropriate mixing bucket and slowly add approximately 5 parts BAL Micromax 3 ECO Tile Grout powder to 1 part clean cold water by weight. (see table) Never add more water than recommended as this may lead to colour inconsistencies in the finished grout.
2. Mix until lump-free mortar achieved.
3. Allow the mixed BAL Micromax 3 ECO Tile Grout to stand for 2-3 minutes before re-mixing for 30 seconds. No further water should be added after original mixing. Avoid entraining air by mixing at too high speed.
BAL Micromax 3 ECO Tile Grout Application Instructions:
1. Check potential staining risk: apply BAL Micromax 3 ECO Tile Grout to a few tiles in a small trial area. If discolouration occurs or difficulties are encountered with cleaning off (surplus grout), apply BAL Protective Sealer and repeat the trial.
2. Work in small areas with a grout float or squeegee. Completely fill tile joint with mixed grout and compact well, removing excess grout from tile surface as work proceeds.
3. Allow approx. 15 minutes for the BAL Micromax 3 ECO Tile Grout to dry (at 20°C) or when the surface of the grout joints is dry enough to be touched (NOT fully set/Cured).
4. Using a dampened sponge or sponge board, clean the surface diagonally to grout lines. Use as little water as possible to wash off the grout but rinse out sponge/sponge board frequently with clean water. NOTE: Do NOT allow water to enter un-grouted joints.
5. When the grout has set sufficiently within joints, polish the tile surface with dry clean cloth.
6. Clean any remaining light haze from the surface next day, using water and a white emulsifying pad and gripper.
7. Wait a minimum 3 hours before subjecting tiles to normal service conditions. If completing a shower, do NOT use shower for at least 2 weeks.
Technical Data:
Powder:Water Ratio (weight): 5:1
Pot Life at 20°C: Up to 30 mins
Cure Time at 20°C: 2-3 hours
Specific Gravity: 1.5/cm³


Reviews
There are no reviews yet.